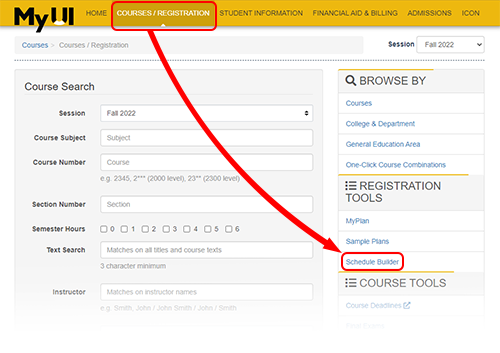
In MyUI, click “Courses/Registration” in the gold bar across the top of the page. Then click on the“Schedule Builder” link in the column on the right
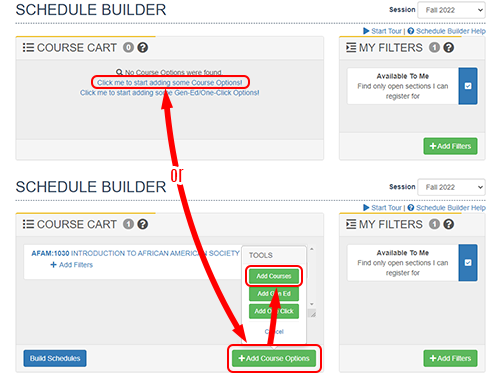
Now you’ll see your cart, and it will look different depending on whether anything is already in it or
not. Either click the blue link in the cart that says “Click me to start adding some Course Options”
or Click the green button below the cart that says “+Add Course Options,” and then select “Add
Courses” from the menu that opens.
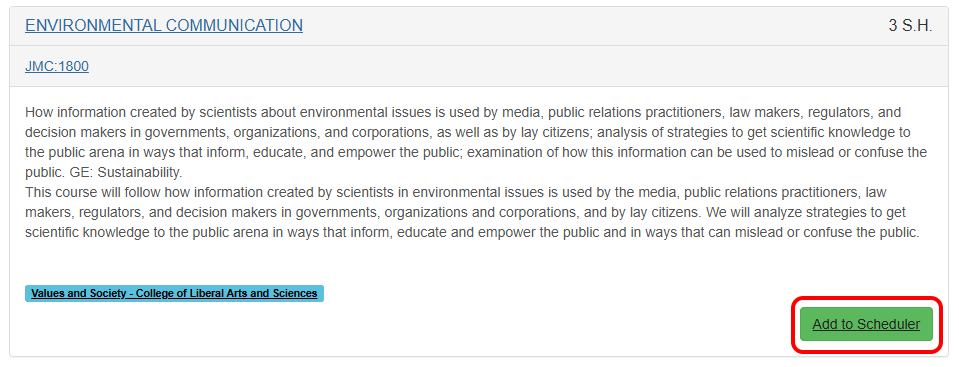
You’ll get to a page where you can enter a course number. In this example, a student has entered JMC 1800 for the course Environmental Communication. The bottom image shows what you will see after you click the “Search” button: a description of the course, and a button that lets you “Add to Scheduler.”
The images below show several different ways you might end up browsing course options, when you don’t know the specific course number to add to your cart. In all of these views, you will see the green “Add to Scheduler” button to the right side of each course. If you click it, you will often then have the option to add either the Course (meaning you want to see schedules using any section of this course) or the Section (meaning you only want to use this specific section).
In the first image, a student was browsing a list of General Education courses and decided to add one to their cart. In this situation, you usually want to select “Course” rather than “Section,” so the Schedule Builder shows you more scheduling options.
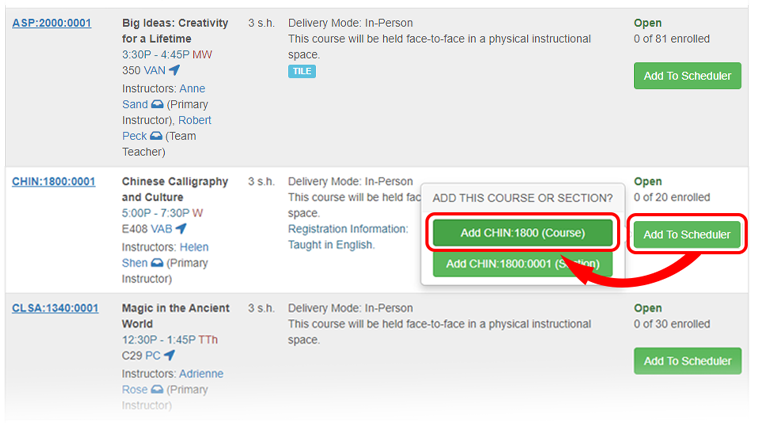
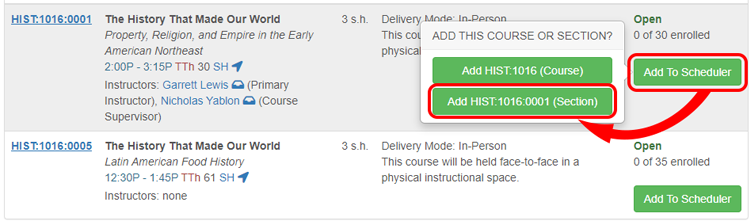
In the second image, you can see one situation where you might choose “Section” instead. Although both of the courses shown are HIST:1016 The History That Made Our World, you can see from the course subtitles that they have different focuses, and you might want to build schedules with one of them and not the other.
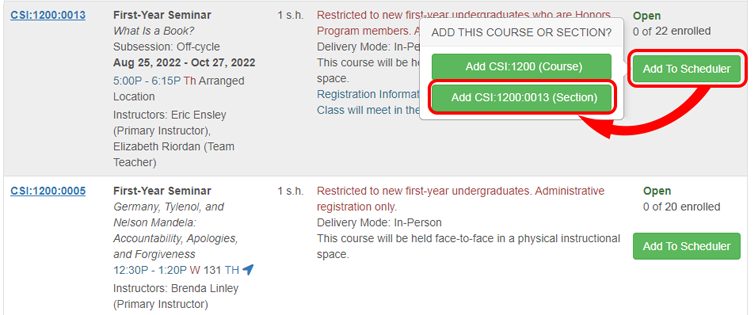
The third image shows a list of First-Year Seminars. As with the history course, many First-Year Seminars have the same course number, so you should select “Section” when adding one to your cart, to make sure Schedule Builder uses the exact seminar you want.
Finally, the last image shows a Courses in Common option. Because this program bundles two courses together, clicking “Add to Scheduler” next to the option you want will put both linked courses into your cart together.
